Metal roof installation is becoming the go-to choice for homeowners seeking a durable, energy-efficient roofing solution that can last 50-70 years. Here’s what you need to know about the process:
Key Installation Steps:
- Planning – Choose materials (steel, aluminum, copper), gather tools, ensure safety equipment
- Preparation – Measure roof, install underlayment and drip edge
- Installation – Install panels from eave to ridge, secure with proper fasteners
- Finishing – Add trim pieces, ridge caps, and sealants for weatherproofing
Essential Benefits:
- Longevity: 50-70 year lifespan vs. 15-25 years for asphalt shingles
- Energy Savings: Reflects heat to reduce cooling costs
- Weather Resistance: Survives hurricanes, hail, and wildfires
- Low Maintenance: Resistant to moss, mold, and organic growth
With its sleek, modern look and maintenance-free performance, metal roofing offers homeowners a lifetime solution. As one recent project noted, “even a light rain will wash leaves and sticks off the roof” – showcasing the self-cleaning benefits that make metal roofing so appealing.
However, metal roof installation requires careful planning, proper safety measures, and attention to detail. While some homeowners tackle this as a DIY project, the complexity of working with metal panels, ensuring proper water sealing, and navigating safety challenges on steep roofs makes professional installation worth considering.
I’m Robert Raffa, CEO of Sunergy Solutions LLC, and I’ve guided countless homeowners through metal roof installation projects across the Northeast, often combining them with solar installations for maximum energy efficiency. My background in both renewable energy and roofing systems gives me unique insight into how these durable roofs create the perfect foundation for long-term home energy solutions.

Starting on a metal roof installation project, whether for your home in Connecticut or your business in Massachusetts, begins long before the first panel is laid. Careful planning, selection of the right materials, having the correct tools, and prioritizing safety are crucial for a successful, long-lasting result.
The type of metal you select for your roof is a foundational decision, impacting everything from cost and aesthetics to durability and lifespan. Each material offers a unique set of advantages and disadvantages.

Let’s explore the most common options:
- Steel Roofing: The most popular and economical choice, steel is strong and durable. It’s coated to prevent rust and lasts 30-50 years, making it ideal for climates with heavy snow or hail, like New Hampshire and Vermont.
- Aluminum Roofing: Lightweight and naturally rustproof, aluminum is perfect for coastal areas like Rhode Island. It’s more expensive than steel but has a similar 30-50 year lifespan. It can be more prone to denting.
- Copper Roofing: A premium, long-lasting option that can endure for 100+ years. Copper is the most expensive choice but develops a beautiful green patina over time, offering best elegance and durability.
- Zinc Roofing: Lasting 80-100 years, zinc is highly durable and weather-resistant. It develops a protective blue-gray patina and is self-healing, meaning it can naturally repair minor scratches.
Beyond the material, the style of metal roofing panel also plays a significant role in both aesthetics and installation.
- Corrugated (Through-Fastened) Panels: These common, affordable panels have a wavy profile and are fastened directly through the face of the panel. Installation is simpler, but the exposed fasteners require careful sealing.
- Standing Seam Panels: Known for a sleek, modern look, these panels have hidden fasteners and interlocking seams that offer superior water resistance. Installation is more complex and often requires professional expertise.
- Metal Shingles/Tiles: These mimic the look of traditional shingles or tiles but provide the durability and longevity of metal.
A successful metal roof installation hinges on having the right tools and materials. Here’s a condensed checklist for your project:
Essential Tools:
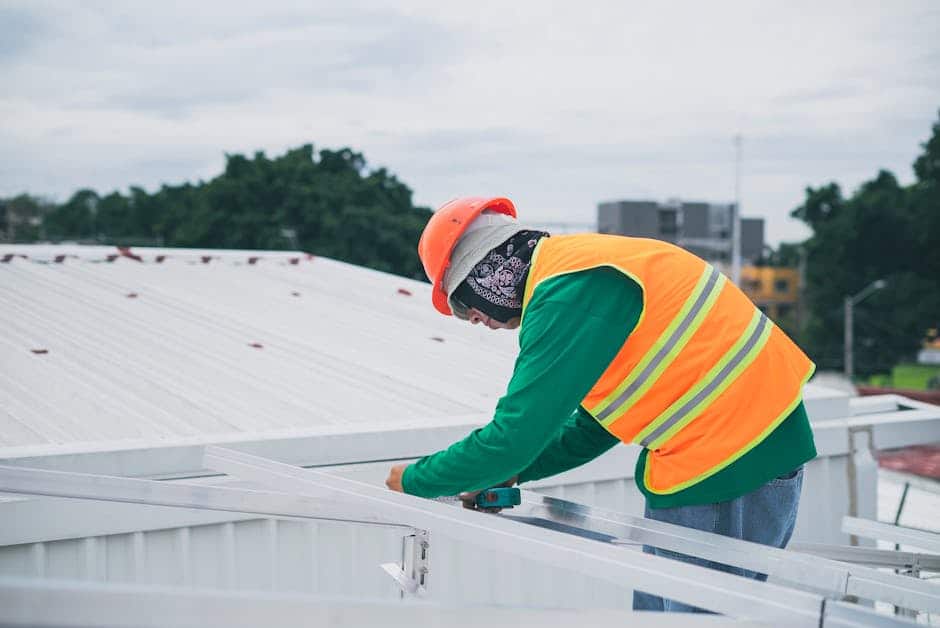
- Safety Gear: Harness, fall protection, safety glasses, cut-resistant gloves, and safety shoes.
- Measuring & Marking: Tape measure, chalk line, and a carpenter’s square.
- Cutting Tools: Metal snips, power shears, or a circular saw with a metal-cutting blade (avoid angle grinders).
- Fastening & Hand Tools: Power drill/driver with a clutch, nut driver bits, hammer, hand seamer, utility knife, and a caulking gun.
- Access & Cleanup: Sturdy ladders or scaffolding, extension cords, and a shop vacuum for metal shavings.
Key Materials:
- Metal Panels & Trim: Your chosen panels, plus eave trim (drip edge), gable trim, ridge caps, and valley/sidewall flashing.
- Underlayment: High-temperature synthetic underlayment and an ice-and-water shield for eaves and valleys.
- Fasteners & Sealants: Color-matched roofing screws with neoprene washers, roofing nails, high-quality silicone sealant, and butyl tape.
- Accessories: Profiled foam closure strips, roofing vent boots, and snow guards (if needed).
For those looking to deepen their understanding, we highly recommend consulting industry-leading resources. Learn from the pros with the MCA Installation Manual provides comprehensive guidance developed by experts in the field.
Safety First: Critical Precautions for Working on a Roof
Working on a roof, especially during a metal roof installation, presents inherent risks. Safety must always be the top priority.
- Use Fall Protection: Always wear a safety harness secured to a proper anchor point. Work with a partner for safety.
- Secure Your Ladder: Place your ladder on stable ground and secure it at the top and bottom.
- Watch the Weather: Never work in rain, high winds, or icy conditions.
- Check for Hazards: Be aware of overhead power lines and other potential dangers.
- Wear Protective Gear: Use cut-resistant gloves to handle sharp metal edges and wear slip-resistant safety shoes.
- Keep the Roof Tidy: A clean work area prevents trips and falls. Immediately clean up metal shavings to prevent rust stains.
- Walk Carefully on Panels: If you must walk on installed panels, step on the flat sections to avoid dents.
 - Metal roof installation")
A safe installation is a successful installation. Never compromise on safety to save time.
How to Accurately Measure Your Roof
Accurate measurement is critical for ordering the correct amount of material and minimizing waste. This step ensures that your metal roof installation proceeds smoothly and efficiently.
- Measure Each Plane: Measure the length (eave to ridge) and width of each individual roof plane.
- Calculate Total Area: Multiply length by width for each plane and add them together to get the total square footage.
- Factor in the Slope: For a more precise area, multiply your total square footage by a slope factor. You can find these factors online, but for a rough estimate, a 4/12 pitch adds about 5% to the area.
- Measure Trim Lengths: Measure the linear feet of all eaves, gables, ridges, and valleys to order the correct amount of trim and flashing.
- Add a Waste Factor: Order at least 10% extra material to account for cuts, mistakes, and waste.
- Order Panel Lengths: Whenever possible, order panels long enough to run from eave to ridge in one piece to minimize seams. Remember to account for a 1-inch overhang at the eave.
Taking these precise measurements will save you time, money, and frustration during your metal roof installation.
Once planning is complete and materials are on-site, the hands-on work of metal roof installation begins. This process involves several critical steps, each requiring attention to detail to ensure a watertight, durable, and aesthetically pleasing roof.
Step 1: Preparing the Roof Deck
The foundation of any good roof is a well-prepared deck. This step is crucial for the longevity and performance of your new metal roof.
- Tear-Off or Overlay: A full tear-off of old shingles is highly recommended to inspect the roof deck for damage. Installing over shingles is possible but has risks (see our section on this below).
- Inspect and Repair: Check the plywood or OSB sheathing for rot or damage. Replace any compromised sections to ensure a solid foundation. For significant issues, consider our Professional Roof Repair services.
- Clean the Deck: Remove or hammer down old nails and clean the entire surface of debris.
- Check Local Codes: Verify local building codes in your area (whether it’s New Hampshire, Rhode Island, or Virginia) for specific requirements regarding tear-offs or underlayment.
Step 2: Installing Underlayment and Drip Edge
With your roof deck prepared, the next layer of protection is the underlayment, followed by the crucial drip edge. These elements work together to create a watertight barrier beneath your metal panels.
- Install Underlayment: Roll out a high-temperature synthetic underlayment over the entire roof deck, starting from the eave and working up. Overlap each course according to the manufacturer’s instructions, ensuring it lies flat. In colder climates like Maine and Vermont, an ice-and-water shield at the eaves provides extra protection against ice dams.

- Install Drip Edge: The drip edge directs water into the gutters and protects the fascia. First, install the drip edge over the underlayment along the eaves (bottom edges). Then, install it along the gable ends (sloped sides). Fasten it with roofing nails every 16 inches. For a better seal, apply sealant tape under the drip edge.
This meticulous layering ensures that even if moisture penetrates the metal panels, the underlayment and drip edge provide a robust secondary defense against leaks.
This is where your metal roof installation truly takes shape. Installing the first panel correctly sets the stage for the entire roof.
- Square the First Panel: Snap a chalk line perpendicular to the eave to ensure your first panel is perfectly straight. This alignment is critical for the entire roof.
- Position and Secure the First Panel: Apply foam closure strips along the eave to seal the bottom of the panels. Place the first panel against your chalk line, allowing for a 1-inch overhang at the eave to direct water into the gutter. Fasten the panel according to the manufacturer’s specified pattern.
- Fasten and Overlap Panels: Use roofing screws with neoprene washers, driving them until snug but not over-tightened. Apply a bead of sealant along the edge of the installed panel before overlapping it with the next one. Ensure the panels nest together correctly to create a watertight seam. Continue this process across the roof, and clean up metal shavings immediately to prevent rust.
- Cut and Flash Obstacles: Use metal snips or a proper metal-cutting saw blade to cut panels around vents and chimneys—never use an angle grinder. Install appropriate flashing (e.g., vent pipe boots) around all penetrations to ensure they are waterproof.
Step 4: Finishing with Trim and Ridge Caps
The final touches of trim and ridge caps are not just aesthetic; they are crucial for sealing the roof and protecting vulnerable edges from weather.
- Install Trim Pieces: Install gable (rake) trim along the sloped sides of the roof over the panels. In valleys where two roof planes meet, specialized valley flashing is installed before the panels are laid. Where the roof meets a wall, use wall flashing to prevent leaks.
- Install the Ridge Cap: The ridge cap covers the peak of the roof, providing a finished look and a watertight seal. First, install outside foam closure strips over the top of the metal panels at the ridge. Then, install the ridge cap over the strips, securing it with screws at each main rib. Overlap consecutive ridge cap pieces by about 6 inches, using sealant between the overlaps.
Ensuring a watertight seal at every junction—from panels to trim to penetrations—is paramount for the long-term performance of your metal roof. This often involves a combination of careful overlapping, sealant tapes, caulking, and proper fastening.
Post-Installation: Care, Common Pitfalls, and Professional Advice
Once your metal roof installation is complete, it’s easy to assume the work is done. However, understanding common mistakes and basic maintenance will ensure your investment truly lasts a lifetime.
Even experienced DIYers can fall victim to common errors during metal roof installation. Avoiding these pitfalls will save you headaches and costly repairs down the line:
- Improper Fastening: Over- or under-tightening screws can cause leaks. The washer should be snug but not crushed.
- Incorrect Panel Overlap: Failing to overlap panels correctly according to manufacturer specifications will lead to leaks.
- Cutting on the Roof: Metal shavings will embed in the panel coating and cause rust spots. Always cut on the ground.
- Using the Wrong Tools: An angle grinder will damage the panel’s protective coating. Use metal snips or a metal-cutting blade.
- Skimping on Sealant: Use high-quality sealant and butyl tape as specified to ensure all seams and trim are watertight.
- Misaligned Panels: If the first panel isn’t perfectly square, the entire roof will be crooked.
- Ignoring Instructions: Always follow the manufacturer’s guidelines to avoid voiding your warranty and ensure proper performance.
Maintaining Your New Metal Roof
One of the most attractive benefits of metal roofing is its low maintenance. Unlike asphalt shingles, you won’t be dealing with constant granule loss or curling.
- Annual Inspection: Once a year, visually inspect your roof from the ground using binoculars. Look for loose fasteners, damaged trim, or debris buildup. You can also schedule a professional Roof Inspection for a more thorough check.
- Clean Debris: While mostly self-cleaning, remove any heavy debris from valleys or around chimneys to prevent water dams.
- Check Fasteners: Ensure exposed screw heads are still snug and the washers are intact. Re-tighten if necessary, but do not over-tighten.
- Touch Up Scratches: Use manufacturer-approved touch-up paint on any scratches to prevent rust.
- Enjoy Low Maintenance: Metal is naturally resistant to moss, mold, and algae, unlike asphalt shingles, which means less cleaning and upkeep.
Installing Over Shingles vs. a Full Tear-Off
A common question is whether to install a new metal roof over existing asphalt shingles. While possible, it comes with trade-offs.
Installing Over Shingles (Overlay): The main benefit is cost and time savings, as you skip the labor-intensive tear-off process. However, this approach has risks. You can’t inspect the underlying roof deck for rot or damage. Trapped moisture can also become a problem if the roof isn’t properly vented. If you choose an overlay, it’s critical to install a breathable underlayment and use furring strips (battens) to create an air gap for ventilation and a solid attachment point for the new panels. Also, be sure to check local building codes, as some jurisdictions limit the number of roof layers allowed.
Full Tear-Off: This is the recommended method. Although it costs more and takes longer, it allows for a thorough inspection and repair of the roof deck, ensuring a sound foundation for your new roof. It eliminates the risk of trapping moisture, reduces the overall weight on your home’s structure, and is the best way to ensure a long-lasting, problem-free installation that complies with manufacturer warranties.
We often get asked many questions about metal roofing, especially by those considering it for the first time in places like Virginia or Rhode Island. Here are some of the most common inquiries.
A key benefit of metal roofing is its longevity. A properly installed metal roof can last 50 to 70 years or more, which is two to three times longer than a typical asphalt shingle roof. While standard steel or aluminum roofs last 30-50 years, premium materials like zinc and copper can last over a century. Metal roofs are also highly resistant to fire, hail, and high winds, offering superior protection and peace of mind.
This is a common myth. A modern metal roof is not noisy when installed correctly. When installed over a solid roof deck with proper underlayment, a metal roof is often just as quiet as an asphalt shingle roof. The layers of sheathing and insulation in your attic effectively dampen the sound of rain. Noise is only a concern on structures without a solid deck, like a barn or shed. While severe hail can dent any roof, the sound is not the issue most homeowners fear.
Absolutely. A metal roof is the ideal platform for a solar panel system, a combination we specialize in at Sunergy Solutions LLC.
- Matching Lifespans: Solar panels last 25-30 years, while a metal roof can last 50-70 years. This means you won’t have to remove your panels to replace the roof, which is a common and costly issue with asphalt shingles.
- Structural Integrity: Metal roofs provide a strong, stable base for mounting solar panels.
- Easy, Secure Mounting: Standing seam metal roofs are particularly good for solar, as mounting clamps can attach directly to the seams without making any penetrations in the roof deck. This eliminates any risk of leaks.
- Combined Energy Efficiency: A cool metal roof already reflects heat, reducing your cooling costs. Adding solar panels takes your home’s energy efficiency to the next level.
Whether you’re looking to install a Residential Solar Array or are planning to How to Replace Roof with Solar Panels simultaneously, a metal roof provides the perfect, durable foundation.
Conclusion: Is DIY Right for You?
Installing a metal roof is a major undertaking. While this guide provides a comprehensive overview, it’s crucial to honestly assess if a DIY approach is right for you.
DIY Challenges:
- Complexity: Metal roofing requires precise cuts, careful sealing, and experience with flashing details, especially for complex standing seam systems.
- Safety Risks: Working on a roof with sharp, heavy materials is dangerous without proper training and fall protection equipment.
- Specialized Tools: The project requires specialized tools that can be expensive to buy or rent.
- Warranty Invalidation: A single mistake can void your manufacturer’s warranty.
When to Hire a Professional:
For most homeowners, hiring a professional for metal roof installation is the safest and most reliable option. An expert brings:
- Experience: Professionals know how to handle complex roof layouts and ensure a watertight seal.
- Safety & Efficiency: They have the right tools and safety gear to do the job quickly and correctly.
- Guaranteed Work: Professional installation is backed by both manufacturer and workmanship warranties.
At Sunergy Solutions LLC, we pride ourselves on delivering safe, reliable, and affordable roofing solutions throughout Connecticut, Massachusetts, Maine, New Hampshire, Rhode Island, Vermont, and Virginia. For a guaranteed professional result that protects your home and investment, the expert Roofing Services from Sunergy Solutions LLC ensure a perfect fit and finish. Our team handles everything from precise measurements and material selection to meticulous installation and post-project cleanup.
Ready to upgrade to a durable, energy-efficient metal roof? Contact us today for a comprehensive consultation and quote. Let us help you transform your home with a beautiful, long-lasting metal roof that stands the test of time.